JESSICA TOMASTIK
Outdoor Adventure Programmer
If you’re like me and you never got around to deciding on a New Years’ resolution, here’s a perfect one to adopt for spring: try composting! This is an easy, family-friendly way to reduce your household waste all year-round, and it will cut down on your fertilizer costs during the spring and summertime. Composting can seem daunting at first, but hopefully this post will give you all the tools you need to start your composting journey.
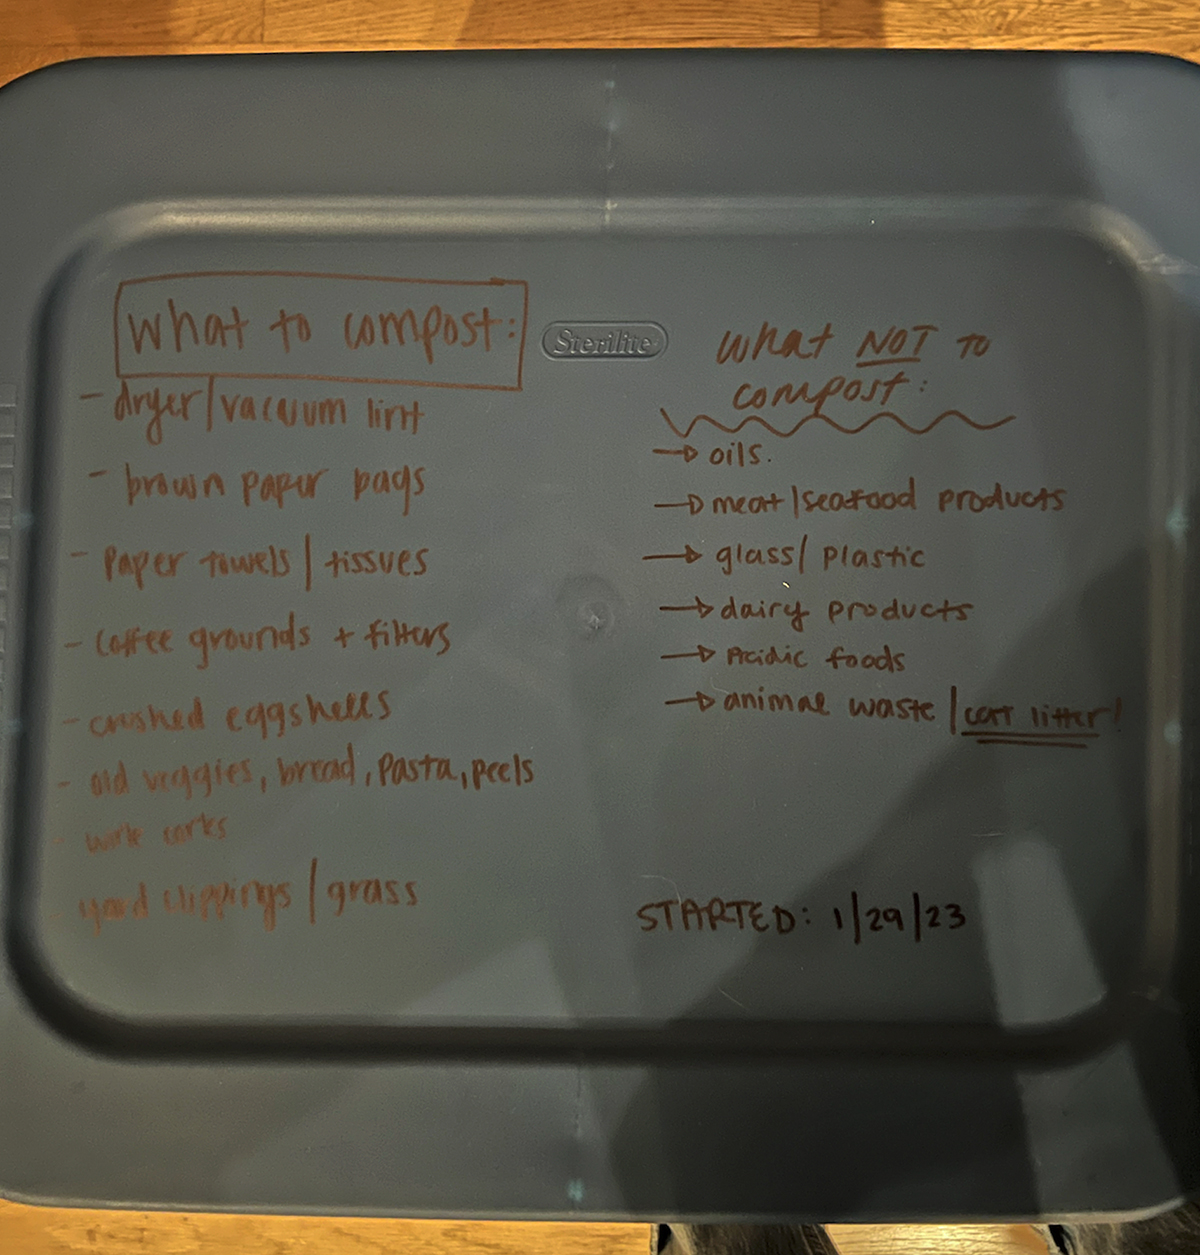
Here is a quick list of some of the benefits of composting:
-
- Improves soil health
- Reduces waste
- Cuts down on soil costs
- Lowers carbon foot-print
- Hands-on learning about decomposition
Composting is extremely beneficial for home gardens by providing enriched, balanced soil while also limiting food waste. However, buying a composting bin can be pretty expensive, with some bins ranging upward of $300. Seeing the price of these store-bought bins can be discouraging, so I set out to find an affordable and easy way to start composting with items you might even already own.
The style of bin that I found to be the easiest and most affordable requires the following materials:
-
- One 18-gallon plastic bin with one fitted lid
- Two bins will be needed if your designated spot is indoors or on a surface
- A drill (any drill bit size will work)
- Newspaper or dry leaves (optional but recommended)
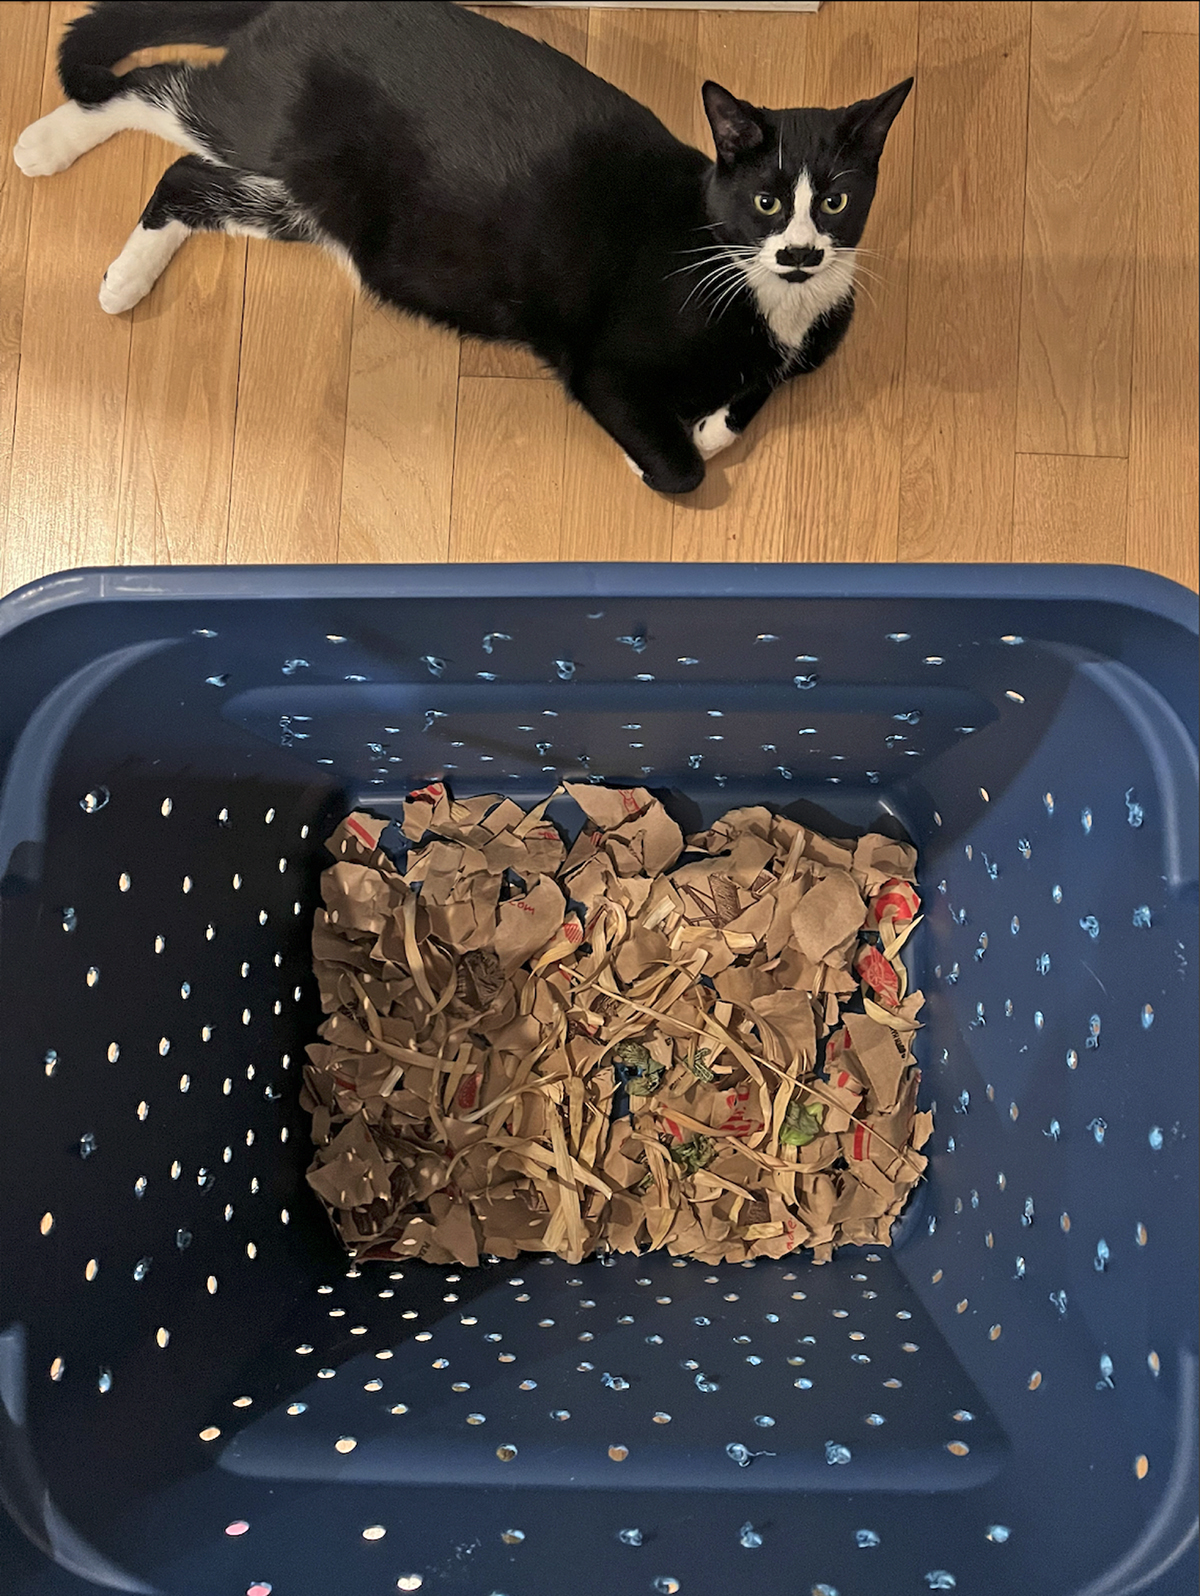
The first step to creating your compost bin is to designate a place to keep it — you can place this bin in a garage, on a porch, or in your backyard. If you’re placing your bin outside on grass or dirt, then you will only need one bin. Now, take a drill and make holes 2 inches apart on all sides of the bin (including the bottom).
**If you will be placing your bin in a garage or on a porch/balcony, then a second bin will be needed. For the second bin, drill holes in all four sides but not the bottom. Place the first bin inside the second bin so the second bin can catch the compost liquid. This 2-bin method will keep your space dry and clean. You do not need to drill holes in the lid.
The final step is to take some ripped newspaper or dry leaves and layer the bottom of your bin. This creates a good foundation for your food scraps, and will keep the compost from getting too wet. Now you’re ready to go! The bin will need to be shaken once every other day.
To learn more about composting and other bin options, The Spruce has great tips and tricks!
Thank you so much for simplifying how to compost and what not to compost. I look forward to having a healthy flower bed this year.